
How to Build Accurate Revit Toposolids from Survey Data
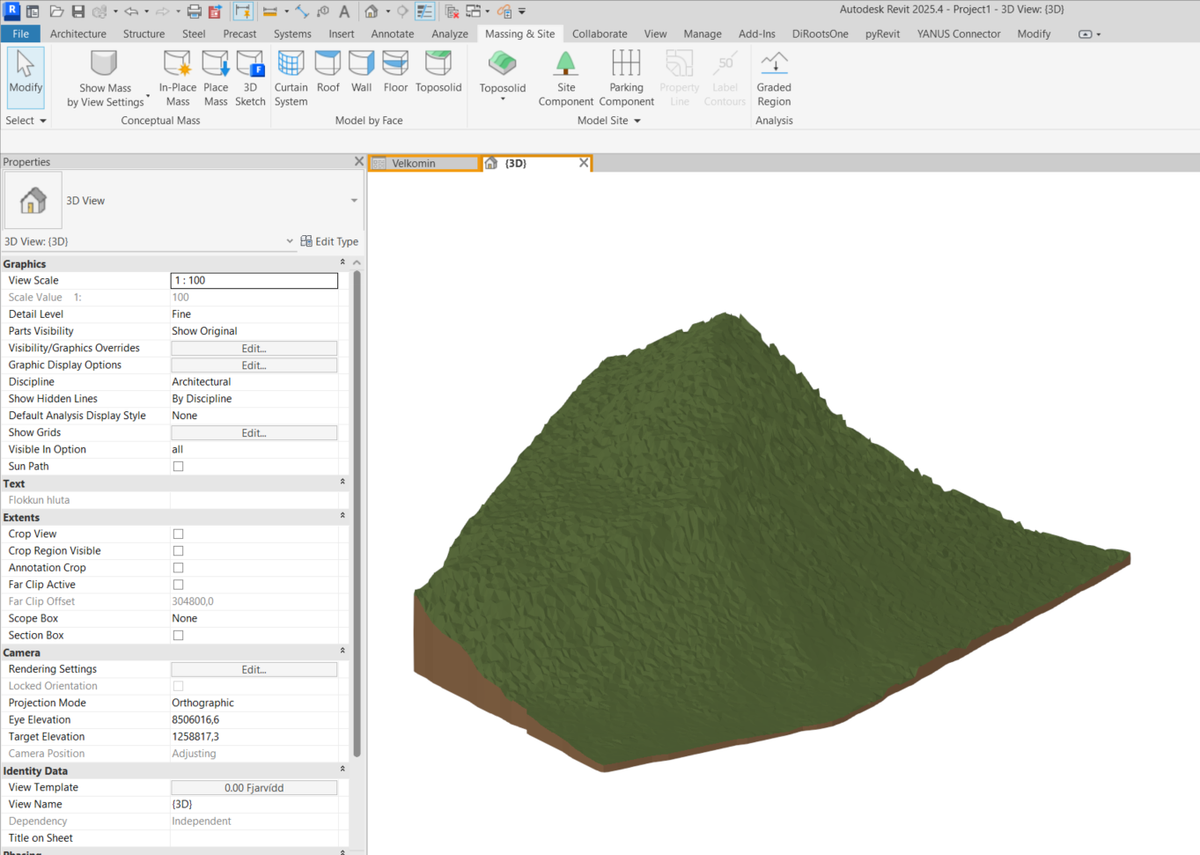
Stop manually tracing contour lines in Revit. Learn how to turn elevation survey data into an editable native Revit Toposolid using Topo-grapher in minutes.
Used by architects in Scandinavia, Europe and the USA
If you have ever tried to build accurate terrain in Revit, SketchUp, or Rhino by hand, you already know the feeling: it’s slow, it’s tedious, and somehow the ground surface never quite sits where the survey says it should.
Here in Iceland, site setup used to feel like a rite of passage. For most projects, you dig up an official survey document-often on paper or a flat PDF-with spot elevations marked across the plot. Then comes the manual labour: redrawing the site and typing in level points point by point, hoping the resulting surface is close enough to reality to design against. Spoiler: it rarely is, at least not to the accuracy you actually need.
That frustration is exactly why I built Topo-grapher. It handles the repetitive setup work automatically by pulling real elevation data from local and national survey sources and delivering it ready to use inside your design software.
Why Native Revit Toposolids Matter (No More Frozen IFC Meshes)
Plenty of GIS and map web tools can spit out a 3D terrain shape. The part most tools fail at is handing you a native, editable Revit Toposolid.
Instead of dropping a frozen IFC mesh into your project-which you have to fight every time the building pad shifts or a retaining wall moves-Topo-grapher provides clean, coordinate-aligned point data designed for Revit's native site tools.
Working with a real Toposolid means you can:
- Modify ground points and grading natively as the scheme evolves.
- Adjust finished floor levels without breaking the site connection.
- Perform real cut-and-fill calculations directly inside Revit.
- Avoid the classic routine of rebuilding the terrain surface manually halfway through planning.
How to Import Your Terrain into Revit (Step-by-Step)
Generating an editable Toposolid in Revit from Topo-grapher point data takes less than two minutes:
- Export the CSV Point File:
Select your project site on topo-grapher.com and download the elevation data as an XYZ / CSV file. - Open Your Revit Site Model:
Launch Revit (2024 or newer for native Toposolids) and open your project file or site model. - Generate the Toposolid:
- Go to the Massing & Site tab on the ribbon.
- Open the Toposolid split button, then choose Create from Import > Create from Points File.
- Select your downloaded
.csvfile.
- Confirm Units & Elevation:
Set the point format units (usually Meters) to match your site data. Revit will instantly convert the XYZ coordinate points into a fully editable 3D Toposolid element.
One Honest Caveat: Always Verify Your Site Data
While Topo-grapher uses high-resolution official elevation datasets, you should always check the generated surface against your physical site survey or surveyor's benchmark. Public elevation models are fantastic for massing, feasibility, and early site design, but final construction documents still rely on verified ground surveys for legal boundary line tolerances and foundation details.
Even with that verification step, starting with a pre-built terrain surface saves a massive number of hours on every project-time you can spend on actual architecture instead of tracing contour lines.
Ready to Skip the Manual Terrain Setup?
Give it a try for your next project at topo-grapher.com. If you have any questions about coordinate setups, point density, or workflow integration, feel free to reach out!



